%20Taniya%20Nayak,%20Ty%20Pennington,%20Alison%20Victoria,%20and%20Brian%20and%20Sarah%20Baeumler_BOTB_HGTV%20.jpg.rend.hgtvcom.196.196.suffix/1683310636672.jpeg)


How to Winterize Above-Ground and In-Ground Pools
Learn how to prep and protect your swimming pool and its equipment from freezing temperatures during the off-season.

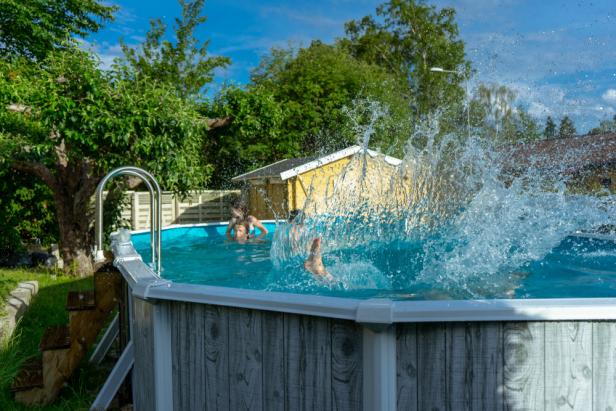
If you don’t use your pool year-round and temperatures in your area regularly drop below freezing, you need to winterize your pool before closing it for the season. Winterizing is a multistep process, doable by most pool owners.
Shutterstock
Winterizing is crucial because freezing temperatures can damage nearly every aspect of an in-ground or above-ground pool, including:
- interior surfaces
- pool equipment
- pool accessories
- plumbing lines, skimmer(s) and valves.
Another important reason to winterize is to create an inhospitable environment for microbes, which can really get groovy when unchaperoned for long periods. Winterizing correctly ensures that when you open your pool in the spring, it’s crystal clear and ready to dive right into.
Who Needs to Winterize
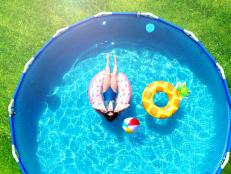
For those living in mild climates with only the occasional freeze, pools can be covered or uncovered and maintained as usual, keeping the water balanced and circulating. If you live in a white-winter kind of place, this article is for you.
When to Winterize
It is important to have winterization complete so you can close your pool before the first hard freeze. But if you winterize too early, there’s a greater likelihood of water chemistry problems arising during the offseason. To set yourself up for success at your pool reopening, wait until water temperatures are consistently below 65 degrees to start winterization.
What You Need
You will likely need to purchase some extra chemicals and one or two items of equipment, but much of what’s needed to winterize you have already for normal pool operation and maintenance.
- The usual pool cleaning supplies
- Water test kit and pool balancing chemicals
- Pool winterizing kit or individual component chemicals
- Winter pool cover plus any appropriate pool cover accessories (e.g., cover pump, air pillow, water tubes or tethers)
- Pool equipment cover(s), if relevant
- Line plugs and skimmer plug or dam
- General hand tools for uninstalling pool accessories
- Protective equipment for cleaning and working with chemicals
- Pool blower, a vacuum with a reverse option or an air compressor and a hose adaptor to blow out the lines (for in-ground pools or above-ground pools with fixed plumbing)
- Garden hose siphon or submersible pump for lowering water (some above-ground pools)
You will also need to locate and keep handy the manufacturer’s winterizing instructions for each item of pool equipment you own (e.g., cover, heater, pump and filter).
Shop Winterization Products


How to Winterize a Pool
There are 10 general tasks involved in winterizing an in-ground or above-ground pool to close it for the season. To do it right, plan for 3 to 5 hours of work spread out over 1 to 2 weeks. Your unique pool set-up will dictate task specifics, including the order in which the tasks are performed and the time between steps.
Before you begin: Review the winterizing directions for each item of pool equipment, your pool cover and any winterizing chemicals you purchased to allow time to grab any additional supplies you may need and to place these tasks in the right order for your pool.
Task 1: Clean the Pool
When: 7 to 14 days before closing
Why: The first step in eliminating contaminants in the pool water.
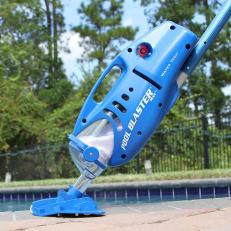
Roll up your sleeves and deep-clean the pool. Brush every surface, skim for debris and vacuum the whole shebang. The more spotless you get the pool, the happier the future-you will be with the now-you. Ensure that your pool filter is clean for the next step.

Elena Elisseeva
Cleaning the pool of debris is the first step in eliminating contaminants in the pool water.
Task 2: Test and Balance the Water
Why: Prevents chemical and biological damage to the pool during the offseason.
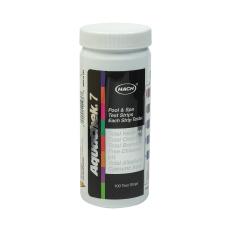
- Test the water using an in-home test kit or strip. Make sure the test is within its expiration date and follow the instructions provided. Sometimes, your pool pump will need to run on high for an hour or more before testing to ensure the water is well-circulated. Sampling should be conducted in the middle of the pool, away from skimmers, jets or chemical dispensers and at a depth of a foot.
- Then, balance the chemistry according to the guidelines for your pool and pool cover.
Task 3: Winterize the Pool Water
Why: As a third step in eliminating contaminants from the pool water.
Winterizing the pool water may involve several chemical treatments:
- Shock: Most pool professionals recommend treating your pool with chlorine-based shock or a non-chlorine shock to remove residual bacteria, algae and waste products. Chlorine-based shock needs to be added a week before closing to avoid interference with other chemicals you’ll add in the interim. Non-chlorine shock can be added closer to closing.
- Algaecide: Once the shock has done its thing, add an additional algaecide to prevent growth during the winter. It can take several days for algaecide to do its work if you currently have an algae problem.
- Stain preventive: Much pool staining is prevented by proper balancing and cleaning, but some pools will benefit from a stain preventive to keep metals in the pool from setting up shop on your water line, particularly if your offseason is long.
Each additive will need to have the opportunity to disperse in your system, so consult the manufacturer's literature for the recommended time to add chemicals and how long to wait between applications.
Shutterstock
Winterizing pool water may involve several chemical treatments.
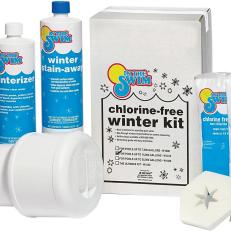
A winterizing kit offers an alternative to buying individual chemicals.
Task 4: Lower the Water Level (Maybe)
Why: Prevents freeze damage to pool materials at the water line.
Pool water is lowered anywhere from an inch to 24 inches, or not at all. Whether you lower your water level and then how much you lower it will depend on climate, the type of pool and your pool cover. Draining some of the pool water before closing is a strategy to protect delicate materials that would otherwise come in contact with frozen surface water — say, the water-line tile on an inground pool. But water is actually protective for liners and pool finishes, and it serves as a support for the pool cover. So, generally speaking, the less water drained from your pool, the better. Consult your pool supplier for the appropriate recommendation.
Note: If you are lowering the water level, ensure that you turn off any automatic timers before you begin so the pump and lights won’t turn on.
Task 5: Winterize Pool Equipment
Why: Prevents microbe growth and damage from frozen water.
- All your hardworking pool equipment — pool pump and filter, pool heater, water feature, chemical feeder — will be receiving a long sabbatical, so they need to be winterized according to the manufacturers’ instructions, beginning with your pool pump and filter. Winterizing equipment may involve changing settings, turning the equipment off, draining, cleaning and storing. Some items will be secured for the winter outdoors and others would rather be stored in a climate-controlled space.
- Ensure that any unused chemicals you remove from storage tanks are stored according to the manufacturer’s instructions.
- If you haven’t already, turn off the power to any timers and pool lighting.
Task 6: Winterize Pool Plumbing
Why: Prevents microbe growth and damage from frozen water.
For in-ground pools and above-ground pools with hard plumbing:
- This step involves purging any remaining water in the plumbing. Use a pool blower, a shop vacuum on its blower setting or an air compressor to blow air through the lines until bubbles appear in the pool. Make sure you use the appropriate amount of air pressure and blow out:
- the suction lines from the main drain and the skimmer(s), removing the skimmer basket first
- lines to accessory equipment such as water features, solar water heaters and automatic cleaners
- the return lines
- Plug all the return lines, the suction outlet and the skimmer(s). A skimmer serves as both a plug and a freeze protector.
- Adding a pool antifreeze solution to the lines at this point offers a second layer of protection, keeping any water left in the system from freezing. Some professionals don’t feel this step is necessary if you adequately purge the lines with air.
For above-ground pools with removable lines:
- Disconnect the hoses, allowing them to drain and dry completely. Then store them indoors in a cool, dark location.
- Plug the return, remove the skimmer basket then protect the skimmer with a freeze plate.
Task 7: Winterize Pool Accessories
Why: Prevents microbe growth and damage from frozen water and enables a cleaner covering of the pool.
- Remove any diving boards, mats, ladders and handrails from the pool. Rinse or clean them as recommended and store them in a dry place. Store the bolts and fasteners in your skimmer basket.
- Remove in-ground pool lights that are within 18 inches of the water line, store them dry or weight them to the bottom of the pool. Remove all pool lights in above-ground pools and store them inside.
Task 8: Do a Final Sweep for Debris
Why: Ensures that you’ve removed all microbes and food sources for microbes.
You’re almost finished, so now is a good time to do a final check for leaves and debris that might have been introduced to the pool during the last few steps.
Task 9: Add Final Closing Chemicals and Accessories
Why: As final preparation for covering.
- Added just before you put the cover on, a winter floater or pill slowly releases chemicals during the offseason to keep the pool clean and balanced. A winterizing kit may include one or it can be purchased separately.
- Above-ground pools benefit from a balloon-style gadget called an air pillow that gets placed in the pool and tethered to the sides before the pool cover is installed. It prevents ice expansion on the surface of the water underneath the cover from damaging pool walls. Air pillows can be used in in-ground pools too, mostly to raise the center of the cover so that rainwater and debris will collect closer to the edges of the pool for easier removal.
Task 10: Install the Pool Cover With a Friend
Why: Keeps a clean pool environment during the offseason.
- Cover the pool and secure the cover according to the manufacturer’s instructions. There are several types of winter covers, each with its own requirements and methods of anchoring. We should have included a helpful friend in the equipment list because if your pool is sizable, this part is a two-person job.
- For pool owners using a solid cover with a pool-cover pump, it’s time to install the pump now, too.

Swim University
If you have a simple plastic cover, get it ready for winter by making sure there aren’t any rips or tears. Repair small tears by duct taping on both sides. For a safety cover, follow the manual instructions for installation.
Off-Season Maintenance
You mean it’s not over? Well, probably not. There are a couple of reasons you will continue to check on your pool over the winter.
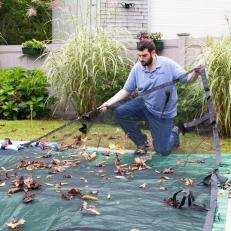
- Cover Maintenance: Depending on your climate and your cover type, you may need to regularly remove debris or precipitation that accumulates on the cover. The added weight can damage your pool and equipment, and standing water presents a drowning hazard. A leaf net — a secondary cover installed over your winter cover — can make the off-season debris easier to manage. The pool-cover pump we mentioned will take care of water accumulation on solid covers.
- Water testing and balancing: Pool equipment manufacturers sometimes recommend off-season water testing, particularly if temperatures are mild or variable. Also, mesh and self-draining pool covers allow rain and melted snow to enter the pool, which might necessitate adjustments to the chemistry. If you do have to add chemicals during the off-season, ensure that you circulate them through the water.
Whether to DIY or Outsource
As you can see, winterizing a pool before closing can be a straightforward process. That said, if you aren’t a fan of reading directions, it’s possible to make very expensive mistakes. A good reason to hire someone is if you have a complicated pool setup, like a multilevel pool with a bunch of water features. Your local pool supply company or installer has a maintenance division that can help. If you're feeling moderately confident, outsourcing winterization the first time and observing the process is a savvy approach.

Pool Systems 101: Saltwater vs. Chlorine
Saltwater and chlorine systems are two of the most common pool sanitization systems. Learn about the pros and cons of each system and find some new alternatives to each.


